
This idea came from Disney and their ever popular trading pins that you can buy in the theme parks. Last year, we took our daughter Kendra on a surprise trip to Disneyland - code name "Black Ops Mickey". We drove from Salt Lake on a ruse that we were taking the "scenic route" to see my mom in St. George, Utah. Yes, it was a stretch, but she was nine and we thought she would be totally clueless. We made it to Barstow before our way-too-smart girl pulled out the atlas and figured out on her own where we were. She says, "Well, if we are in California, then we might as well go to Disneyland!" AHHH, BUSTED! So, we ended up popping the surprise on her in a parking lot in Barstow, California. We were expecting her to go just crazy with excitement, what we got was ... nothing, just crickets.... She just sat there speechless, didn't utter a single word. Sigh - so much for video taping the excitement...
Now, the pins came about for two reasons. One, we wanted to be able to give her some pins put on her lanyard without paying $10 to $15 per pin (OUCH!). Second, we were worried that she would be too scared to ride a lot of the "big kid" rides. So, we made one pin for every ride in the parks, both the Magic Kingdom and California Adventure. And yes, we even made them for the kiddie rides, too. When she went on the ride, she got her "badge of courage" for that ride. We also made others that were just collections of pins. She LOVED this and she fearlessly went on every single ride in both parks, including my personal favorite, the Tower of Terror. In fact, the pins ended up becoming ways for her talk to other kids in line. She started giving them away to kids who saw one that they really liked. We even gave one to a ride operator who was the single best ride operator ever for the Tower of Terror.
The very best part though, was watching my daughter give the first couple of pins away. This little idea to help my daughter be brave turned into "who can we make smile by giving them a pin". Soon all three of us were hunting for people that looked like they could use a pin. I could not be more proud as a parent.
How did we make all the pins, you ask? Here are the steps we used, although we found more and more ways to be creative with this project as we really got into it. Our inspiration came from from the beloved grape soda bottle cap pin that Ellie first gives to Carl, and that Carl in turn gives to Russell in the Disney/Pixar movie "Up".
The hardest part was searching the Internet for images that could be used the make pins for each ride. Not every image looks great on a 1 inch disk of paper, so there was a lot of trial and error. Luckily, my wife is pretty good with Photoshop and she created a layer template that aided in this process. Once we narrowed our images down to the ones we wanted to use, we gathered them all together on one page to be printed out. If you'd like to see our finished works you can view them here: Disney1 and Disney2. They are in PDF format and will download from My Google Documents.
**Please note the graphic sheets have been made to view only, in order to protect the copyrights for all of the images we used. We did not intend for these pins to ever be sold; it was simply a craft project for our own use. If there are any graphics you really enjoy, I am sure we can retrace the billion sites we searched to help you find it.**
Next, we found a great site for blank bottle caps, http://www.bottlecapco.com . They had the best deals on bottle caps, You can order 100 chrome bottle caps for about $5. Compared to what they are going for in the local craft stores, that is a huge bargain! Also on the same website, we ordered the 1 inch epoxy dots, 100 for $14, a 1/16" metal hole punch for $18, and finally, E-6000 glue for $7. These prices are accurate as of May 2012.)
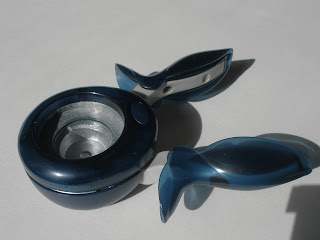
 For the last tool, we went to the local craft store, Jo-Ann, and used a 40% off coupon to purchase a Fiskars brand 1" hole punch. We already had a Martha Stewart brand punch, but found we actually preferred using the Fiskars one; it was easier to line up with the images.
Here's how we assembled the pins:
- Print the images and spray them front and back fairly heavy with a fixative.
- Punch out the images using the 1" paper punch.
- Place an epoxy dot on top of each cut out image. Work the air bubbles out until image looks clear.
* A small note before moving on about the E-6000 glue. Once you open the tube, it wants to continually ooze, so keep something under it to protect your surface. You have about 1 or 2 minutes to work with it before the glue gets tacky and you can no longer move your image on the gluing surface, so you may want to get 2 or 3 going at a time.
- Place a very small amount of E-6000 glue on the bottle cap.
- Place your now combined image and dot on top of the glue, then push the image around in a circular motion in order to spread the glue evenly across the bottom side of the image. Center the image on the cap and let it stand for about a minute.
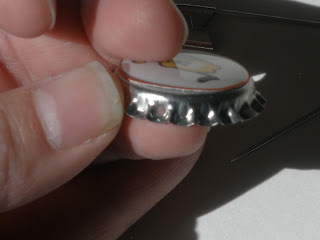
- Once the glue has started to become tacky, carefully press down around the edges of the image and ensure the image has attached all the way around the cap.
When you are done, your cap should look something like this:
- Next, take the 1/16" metal punch and punch a hole on each side of the bottle cap.
- Then take a 2" safety pin and thread it through the holes you just made, and there you have it, an awesome bottle cap pin!
The Disney Princess Cuties were a massive hit with the girls in the park. We gave several of these away:
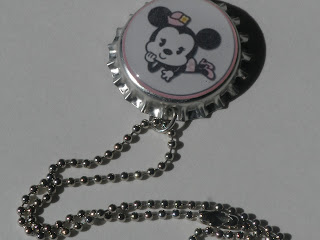
This was a different idea for wearing them we put a single jump ring through the cap and attached a simple, inexpensive ball chain.
This is the bottom side of a a ring attachment you can see the top side of this ring in the image above with the Mickey Cutie on it.
These were really fun to make and ended up being a memorable part of our vacation!
These were really fun to make and ended up being a memorable part of our vacation!


Update: there was a problem with the PDF files not allowing you to download them. this has been fix so you can view them now.
ReplyDelete