You can find the craft on the Disney Family website by clicking here, or you can go straight to the PDF that you need to print off by clicking here.
Note: Our instructions do vary some from the ones printed on the PDF, as we wanted it to be more durable and spin freely.
Here is a list of supplies you'll need:
- printed PDF image of the pinwheel - cardstock will be stiffer, but plain copy paper also works
- wooden dowel - 3/8" inch diameter and cut to 12 to 15 inches long.
- lollipop sticks (you can find these in the cake decorating section of the craft store)
- 2 eyelets each, in two sizes - 1/8" (4 mm) and 3/16" (5 mm)
- glue - Elmer's or craft glue
- scissors
- pliers - wire pliers or regular pliers
- eyelet setter/hole punch
- hand drill with 5/32 bit (or regular drill)
- First, print the PDF images, and then fold in half and glue as shown below. We used a spray adhesive; it works really well. But Elmer's or any craft glue works.
Note: You may also want to spray the page with a fixative before folding it to keep the ink from running.

- Next, cut on the dotted lines on the character side, only to the end of the line. Don't cut all the way to the center.


- Next, use an eyelet setter/hole punch to punch a hole in the center. The hole needs to be large enough for the 5 mm (3/16) eyelet.
- Then, using the same 3/16 hole punch, punch a hole in each of the four corners. Be sure to stay to the left hand side of the cut you made in the paper each time.


Note: This pinwheel pattern in actually reversible. If you start with the the stars and stripes side of the paper (visible in the picture below), it would yield a reversed looking pinwheel in the end.
- Whichever side you choose, place the eyelet in the hole of the first tab.

- Next, the pull the tab directly opposite of the first one onto the eyelet.

- Pull in the other two tabs onto the eyelet. When you are done, the eyelet should be punched through all four tabs.


- Setting the eyelet is the hardest part of this project. We found this cone tip worked the best.

The only way we found was to set the eyelet through the hole on the back of the pinwheel. Don't set the eylet too tight, though. It needs a little bit of wiggle room so you can rearrange the points on the front to look good. (I'm OCD - what can I say?)

- Now place your second 3/16 eyelet through the back and set it through the inside of the pinwheel. It's a little awkward, but doable.

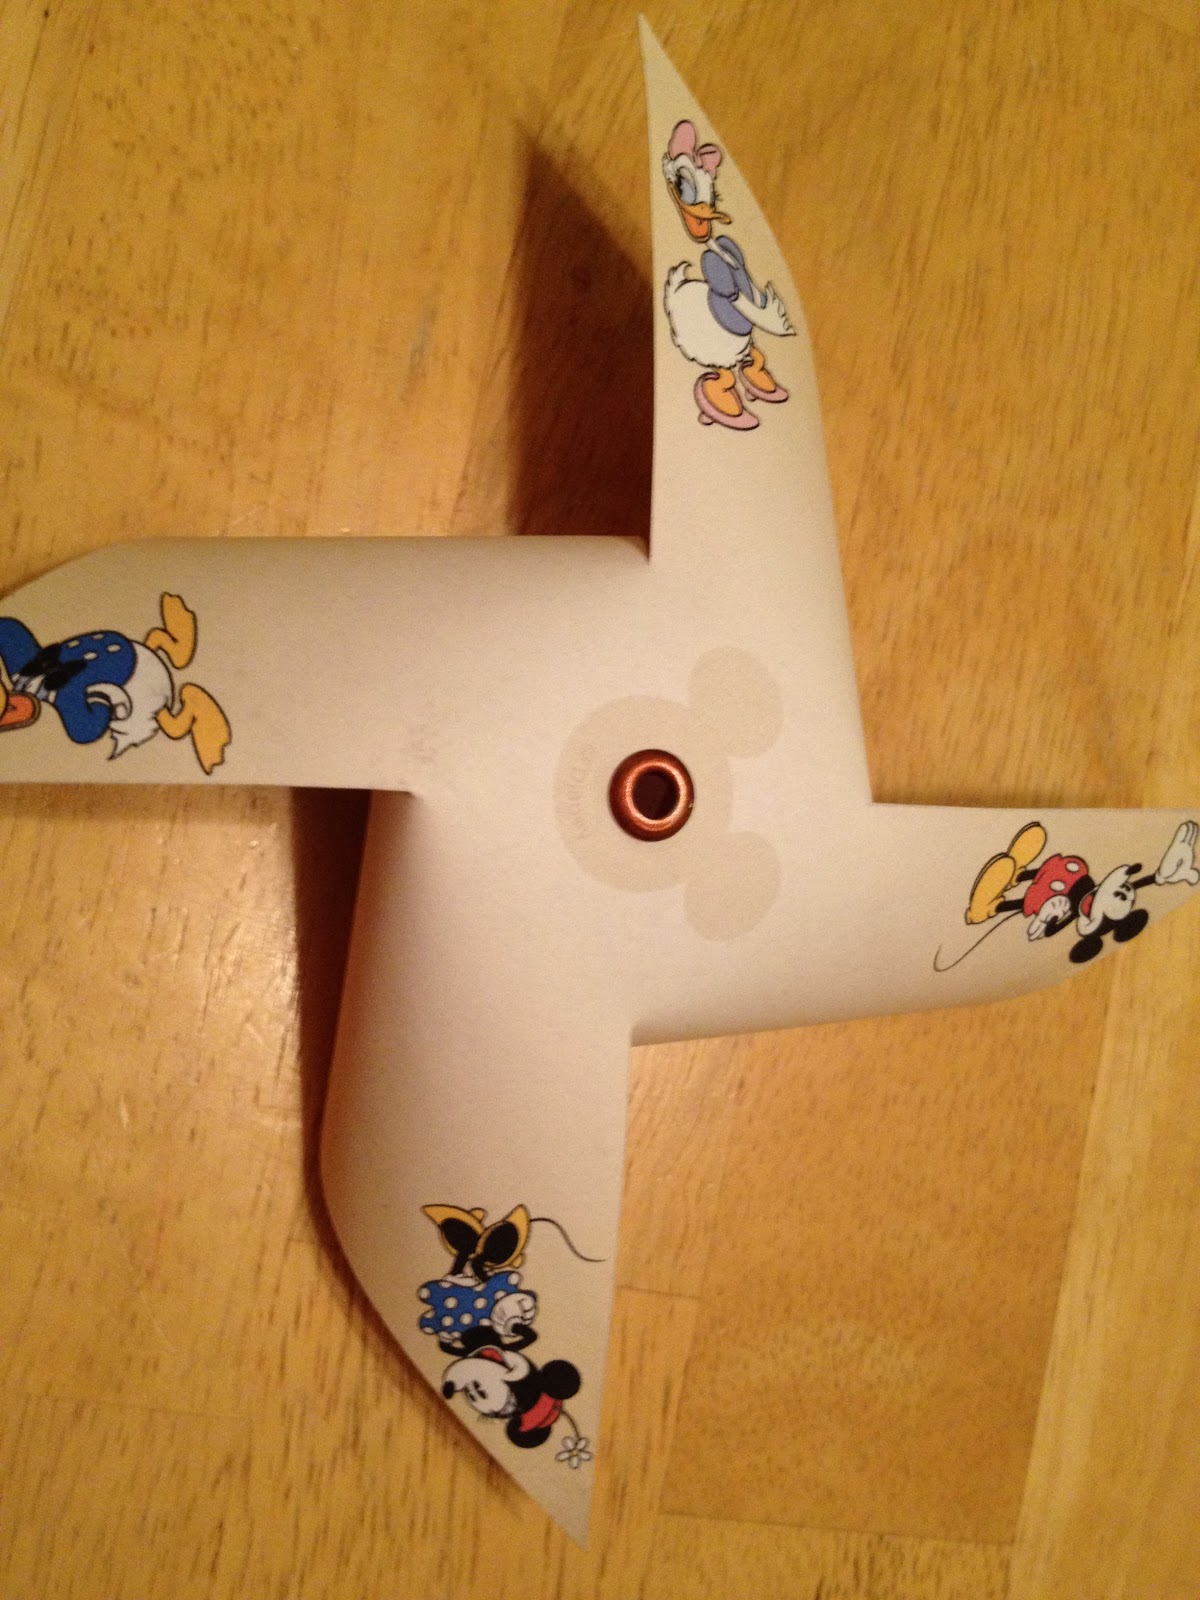
The finished paper portion of the pinwheel should look like this:

- Next, you need to drill a hole through the end of the dowel. Choose a drill bit that is the same diameter as the lollipop stick (about 5/32), and drill all the way through the end of the dowel.

- Next, take the lollipop stick and place an 1/8 inch eyelet on the end, with the finished side of the eyelet facing the middle of the stick.

- Secure the lollipop stick in the drilled hole with some craft glue and then press the eyelet down into the glue as well.

- Now place your pinwheel into its proper position and feed your last eyelet onto the lollipop stick, with the finished side facing out.

- Test the pinwheel to make sure it can spin freely. You'll want to position the eyelet on the lollipop stick so that there is at least 1 1/8" inches of the stick visible. Then trim the excess lollipop stick off and you are left with this:

- Now you need to crimp the eyelet. We used cheap wire crimpers, but even a good pair of needle nose pliers would work. All you are aiming for is crimping the edge of the eyelet that is closest to the paper pinwheel. You only need to squeeze with light pressure, then turn 90 degrees and squeeze again to round the eyelet back out.

And if you are super OCD like me, you color the end of the stick with a black Sharpie, or the same color as whatever the color of the eyelet is. :)


Congratulations! You have a pinwheel that will hold up to a little wear and tear, and it spins freely with even the slightest breeze!

Hey Did you know that this youtube video used your image: https://www.youtube.com/watch?v=pwkiN3DShyI?
ReplyDeleteDid he ask for your permission? at 3:54 you can see it.
I was just curious because I saw he had used alot of images from google.
All the best